There are a few ways to access Pearson eTexts:
| Table of Contents |
|---|
Web browser login for Students
The Pearson eTexts are available from within PowerSchool.
...
| Page Properties | ||
|---|---|---|
|
...
...
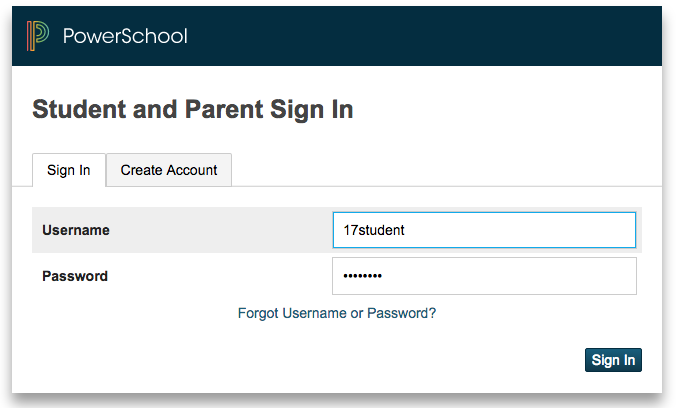
Login using your BRHS username and password
| Expand | ||
|---|---|---|
| ||
|
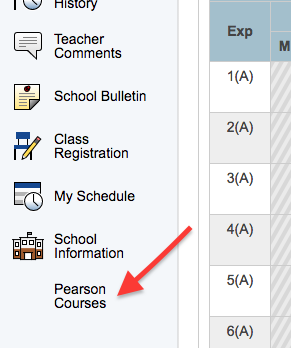
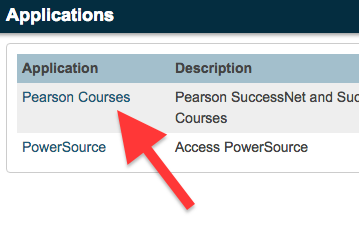
Select the Pearson Courses link from the menu
| Expand | ||
|---|---|---|
| ||
|
...
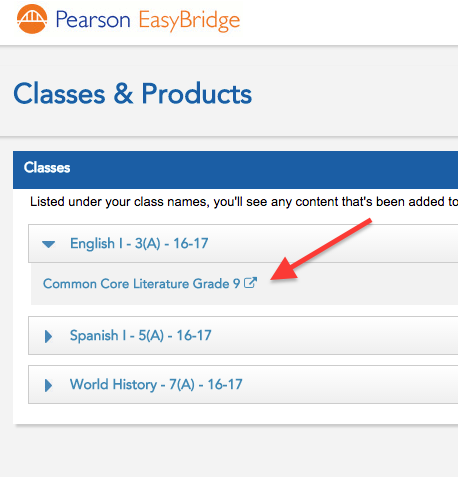
Select the open icon next to the desired course
| Expand |
|---|
|
Web browser login for Teachers
The Pearson eTexts are available from within PowerTeacher.
...
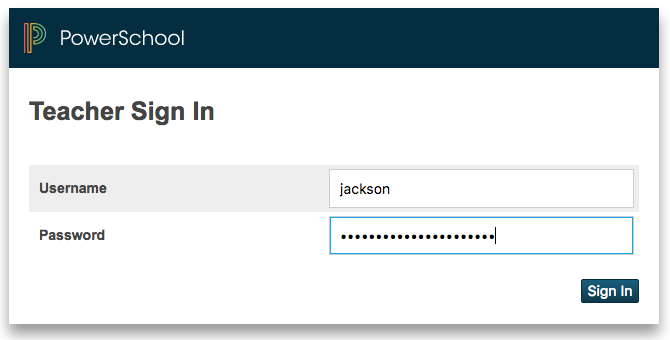
Login using your BRHS username and password
| Expand | ||
|---|---|---|
| ||
|
Select the Applications Menu icon from the top-right. Click Pearson Courses from the Applications Menu.
| Expand | ||
|---|---|---|
| ||
|
Select the open icon next to the desired course
| Expand |
|---|
|
| Excerpt | |||||||||||||||||||||||||||||||||||||
|---|---|---|---|---|---|---|---|---|---|---|---|---|---|---|---|---|---|---|---|---|---|---|---|---|---|---|---|---|---|---|---|---|---|---|---|---|---|
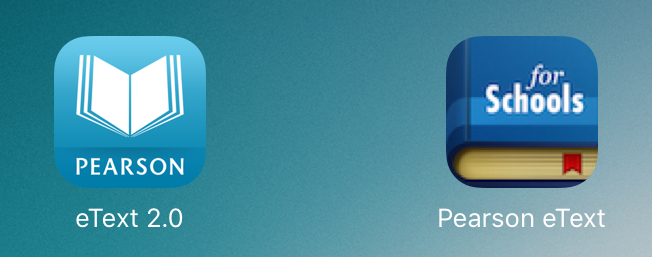
iPad app loginPearson has two iPad apps that have been made available in Self-Service. Depending on your course enrollment, you may need one or both apps. Click on the app in Self-Service to see which courses are delivered by that app.
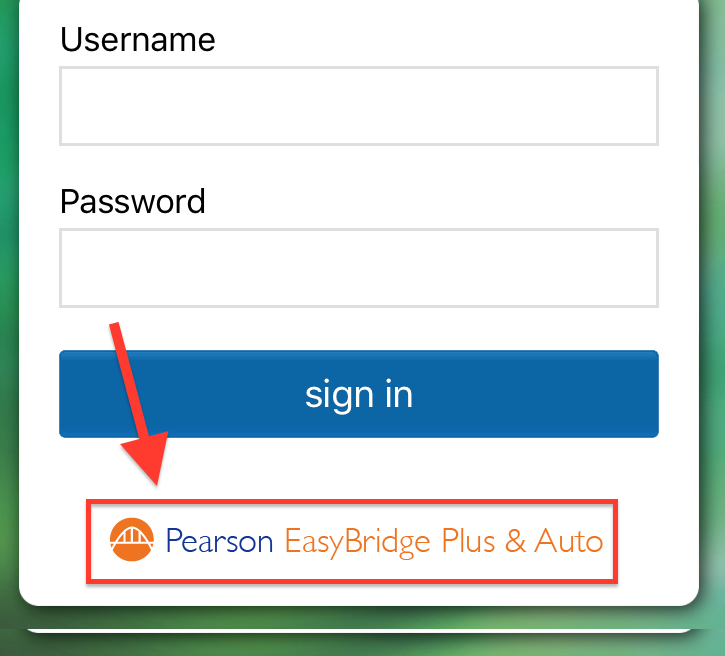
Open the eText app and select the EasyBridge button at the bottom
Search for "Brother Rice High School" in the search box, then click GO.
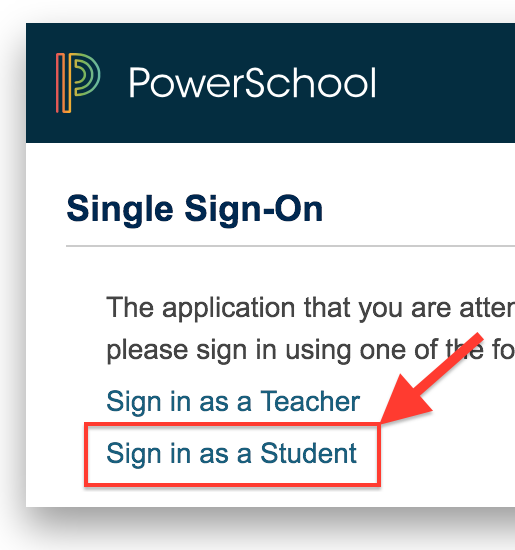
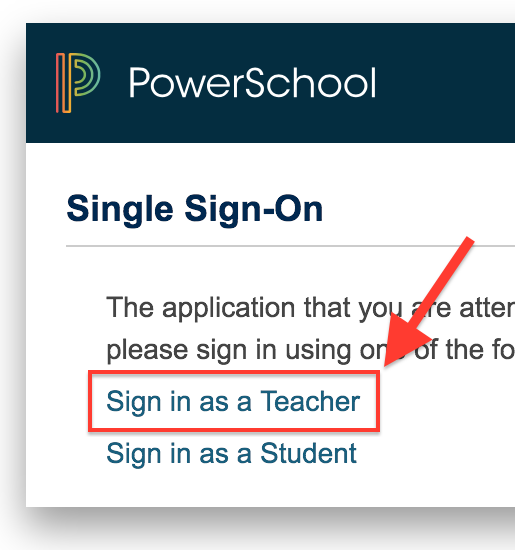
You will be redirected to our PowerSchool. Select Sign in as a Student (or Sign in as a Teacher)
Login using your BRHS username and password
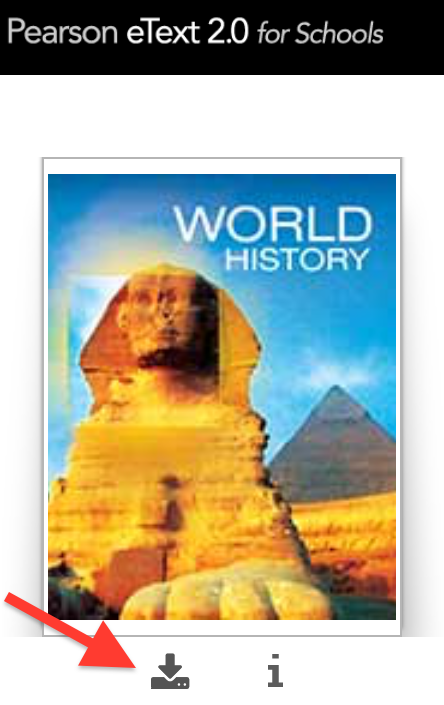
Your available eTexts will be shown. Click on the cover picture to launch the "on-demand" version. This requires the iPad be on WiFi and can be slow during peak times.
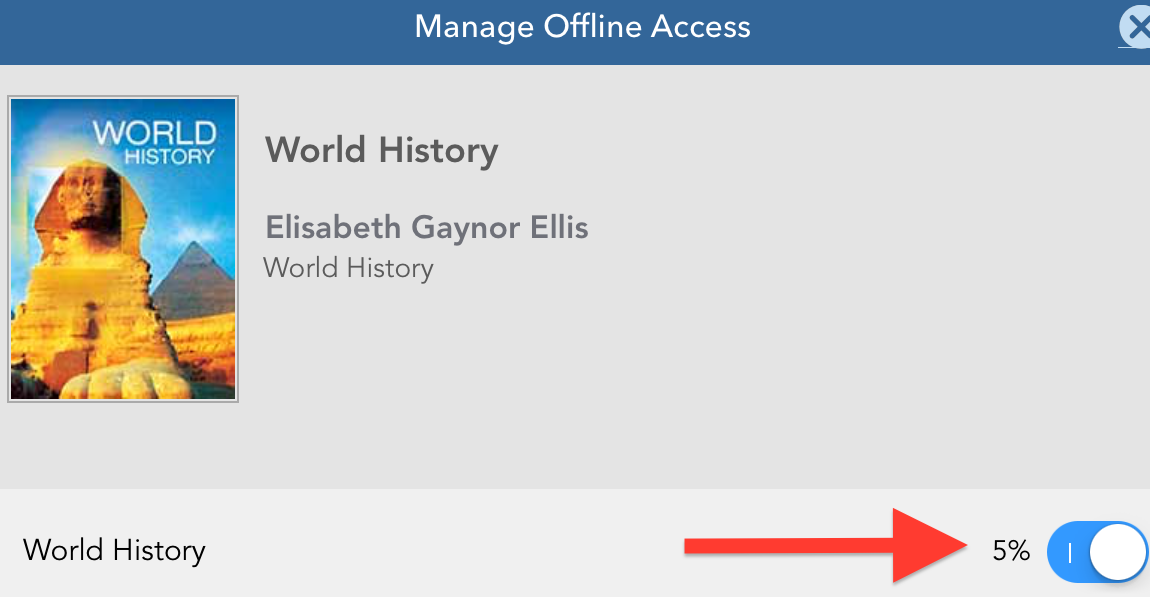
Recommended: You can also download the eText to your iPad so WiFi isn't required. Access the Offline Access menu by clicking the Download arrow under the cover picture. Toggle the download button to start the download. It can take several minutes to download and progress is indicated by percent. Once downloaded, you still have to log into the book (requires WiFi) but accessing the content does not require WiFi.
Tip |
|


Accessing your Realize Reader text on the iPad
| Status | ||||
|---|---|---|---|---|
|
| Status | ||||
|---|---|---|---|---|
|
Ensure the following settings are correct (Settings > Safari):
Disable “Block All Cookies”
Disable “Prevent Cross-Site Tracking”
Navigate to https://schoology.brrice.edu, login with BRHS Google Account if prompted
Navigate to your course, click a Savvas Realize eBook link
You will be prompted with a button to “Open in a New Window”
 The new window will show your text in the Realize Reader!
Use the Realize Reader website download your texts
| Status | ||||
|---|---|---|---|---|
|
| Status | ||||
|---|---|---|---|---|
|
While Realize Reader is not available as an iPad app there is a downloadable version available in Safari.
Follow the instructions at the link below. If your iPad appears to “hang” after completing the “Installing 100%” screen, quit the app/window and open it again.
Adding Savvas Realize material to Schoology
| Status | ||||
|---|---|---|---|---|
|
Navigate to https://schoology.brrice.edu, using a web browser on your computer, open a course/section
Click “Add Materials” then click “Savvas Realize Course Content”
The first time you add Savvas content, you need to complete the linking process
Select “District Login”
Login using your BRHS Google Account
Confirm your name matches before finalizing the linking - “Yes this is my account”
If prompted, check the box next to any Programs or titles you are using - click “Add Programs” if needed
Find a resource to add, example: Student eBook, then click “Import” button
The link to the resource will be added to your Schoology course
 You must click the newly added resource once in each section to finish linking that Schoology section to the Savvas section beforeit will be usable by students.
Your Savvas content is now available to students via Schoology.