Versions Compared

Key

  • This line was added.
  • This line was removed.
  • Formatting was changed.


Category requirements

Note

If you will be importing a large number of materials, such as a back up from last year’s course, DO NOT configure the grade passback (below) until the materials are imported. (All materials initially import as Published and will immediately sync to PowerTeacher Pro if the syncing is already configured.)

Tip

Before syncing any grades please make sure the follwing steps/requirements have been completed.

Step 1 - Create PowerSchool Categories

Expand
titleIn PowerTeacher Pro:

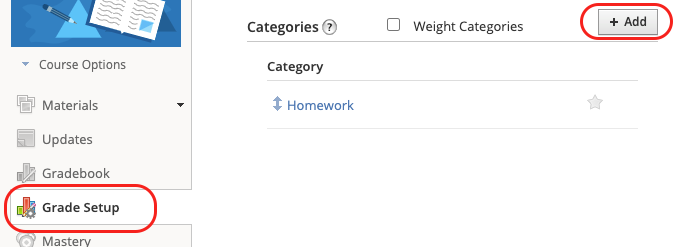
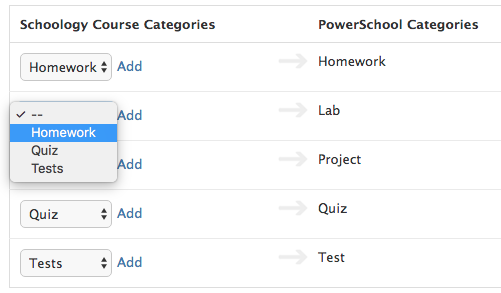
A set of default Categories (i.e., Homework, Project, Quiz, Test, Lab) have been created for categorizing assignments.

  1. To view and edit the Categories, select Grading and then Categories.
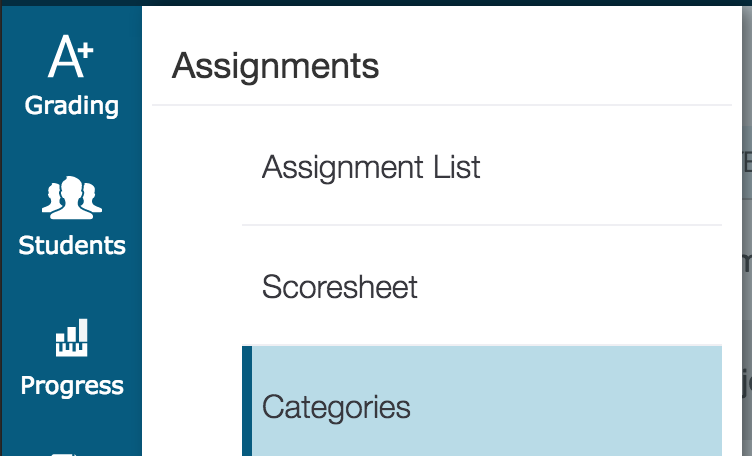
    Image Modified
  2. Select the Edit (pencil) icon to edit the category settings, including class selections. By default, all classes have the default categories assigned.

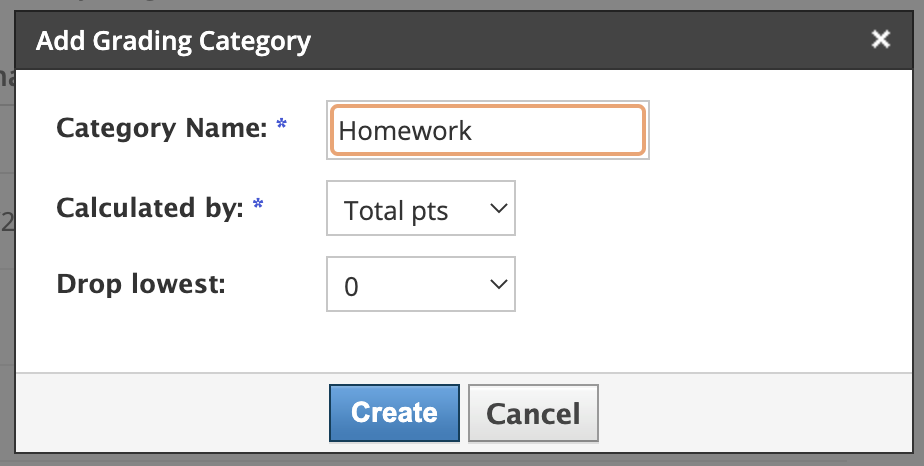
A new or custom Category can be created if needed for categorizing assignments.

  1. To create a new Category, select Create on the charms bar and then choose Category.
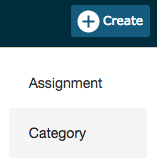
    Image Modified
  2. Select the classes for this category using the Select Classes dropdown.

  3. Choose/enter category information.

    1. Enter category name.

    2. Check Active to make the category active.

  4. Select the Assignment Defaults tab and select the Score Type from the dropdown. The fields change based on to your Score Type selection.

  5. To include new assignments in this category in final grade calculations by default, verify that Count in Final Grade is selected.

  6. To view the categories that are already created, click the View All tab. School-created categories are labeled with an icon that looks like a building. Also, use the View All tab to view the classes that are using each category and the statuses of each category.

  7. Select Save when finished.

Step 2 - Create Categories in Schoology

Expand
titleIn Schoology, do the following for EACH course section:
  1. Open a course/section and select Grade Setup from the left menu.

Image Removed
  1. Image Added
  2. Click + Add to create a new category. Each new course/section contains no categories, they must be made each year.

  3. Type a Category Name, then click Create.

Image Removed
  1. Image Added
  2. Optionally, select a number for Drop lowest, if you want to drop a low score from this category. Note: Schoology and PowerSchool don’t always select the same assignment to drop (Schoology drops the lowest percent while PowerSchool drops the lowest points earned). This can cause confusion when the final grade in Schoology doesn’t match the final grade in PowerSchool.

  3. DO NOT MODIFY the Calculated by field without checking with Technology. The percent option will not calculate term grades correctly.

Step 3 - Map Schoology to PowerSchool Categories

Expand
titleIn Schoology, do the following for EACH course section:
  1.  Open a course and select the PowerSchool app from the left menu.
     

    Image Modified

  2. Select the Configuration tab.

    Image Modified
  3. Map categories by selecting which Schoology categories (on the left) correspond to which PowerSchool categories (on the right). Note: it is okay for more than one Schoology category can map to the same PowerSchool category.
     

    Image Modified
  4. Select Save when finished.

  5. Repeat this process for each course section.

Tip

Linked Sections

Categories must be mapped for each section. To switch between sections that are linked, locate the Section drop-down menu in the PowerSchool app.

Step 4 - Create an assignment in Schoology

  • Each assignment must be given a category in Schoology.

Expand
titleIn Schoology, add a category to the assignment:
  1. Locate the assignment in your materials, from the calendar, or in the Gradebook.

  2. Click Edit.

  3. Find the Category drop-down menu and select a category.

    Image Modified
  4. Select Save Changes when finished.

  • Each assignment must have a due date in Schoology.

Expand
titleIn Schoology, add a due date to the assignment:
  1. Locate the assignment in your materials, from the calendar, or in the Gradebook. 

  2. Click Edit.

  3. Find the Due Date box and fill in the date.

    Image Modified

    1. For linked sections, the Due Date box is labeled "Availability and Due Dates".

      Image Modified
  4. Select Save Changes when finished.

Note

If you do not set a due date, the last day of the term will be used. Example: for Q1 of 2016-17 the date of 10/23 will be used in place of a missing due date.

Step 5 - Sync grades from Schoology to PowerSchool

Assignments are automatically synced to PowerSchool once the there is a category and due date.

Scores are automatically synced after you save them.

Expand
titleIn Schoology, to manually sync or re-sync assignment scores:
  1. Open a course and select the PowerSchool app from the left menu.

    Image Modified

  2. Select the Sync Grades tab to see a list of your graded items available to sync. Assignments that have not been graded will not appear.

    Image Modified
  3. Click the Sync button next to one assignment to sync that assignment. The Status will change to Queued. You can click the Sync Grades tab at the top to reload this page and the status should now indicate Successful. If the status indicates Error, see the troubleshooting section below.

    Image Modified
  4. Load PowerTeacher Pro and confirm that they newly synced assignment appears with the correct name, due date, category, and scores.

  5. Once comfortable you can use the Sync All button to sync all assignments.

    Image Modified
  6. Repeat this process for each class.

Tip

Linked Sections

To switch between sections that are linked, locate the Section drop-down menu in the PowerSchool app. Even though the assignments are most likely the same in each section, you still need to sync them separately.

Troubleshooting

Coming soon!

  • No Category

  • No Due Date

  • Assignment name too long

  • Change of points possible

Page Contents

Table of Contents